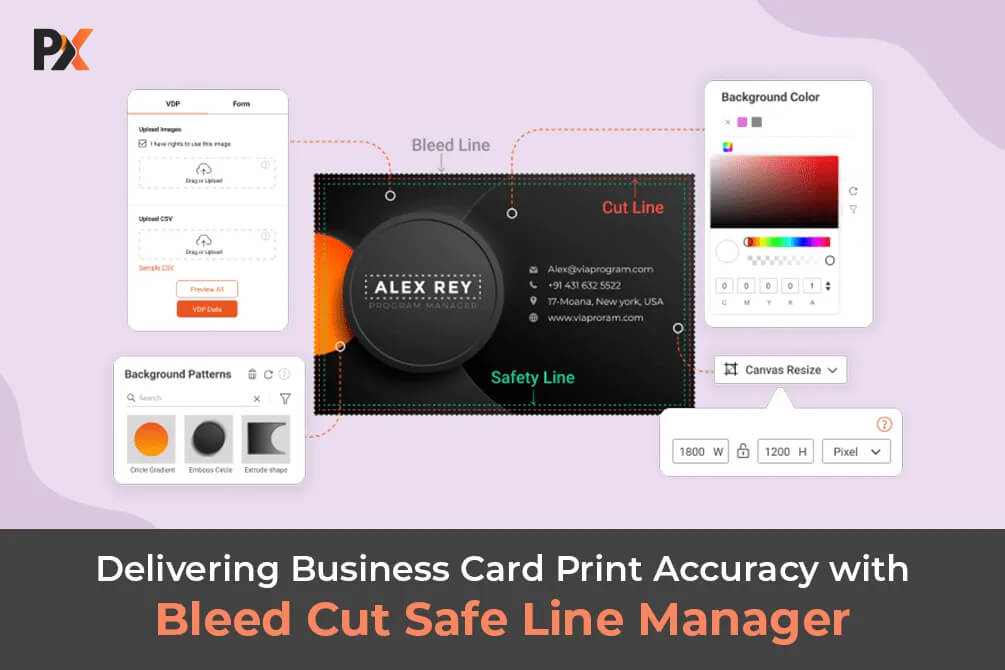
Summary
Imagine you have an online print shop and decide to let customers customize their own cards, banners, and labels.
You expect this feature to increase sales and make customers happy.
But what if the opposite happens?

That’s exactly what occurred when my friend introduced customization to his print shop.
More unhappy customers and endless revisions started pouring in.
The missing piece of the puzzle?

The bleed-cut safety line.
The absence of a bleed area for business card made it challenging for buyers to understand where to place their designs, resulting in disappointing final products.
This seemingly small line plays a big role in preventing blank spaces in prints and ensuring designs stay within the printable area.
Let’s explore why this feature is so essential.
What Are Bleed, Cut & Safe Lines?
When you allow customization, it’s important to ensure that the designs created by customers are print-ready and accurate.
This is where the business card bleed, cut and safety line feature becomes essential.
Let’s delve into each component individually to understand their significance and why businesses need them when offering customization.
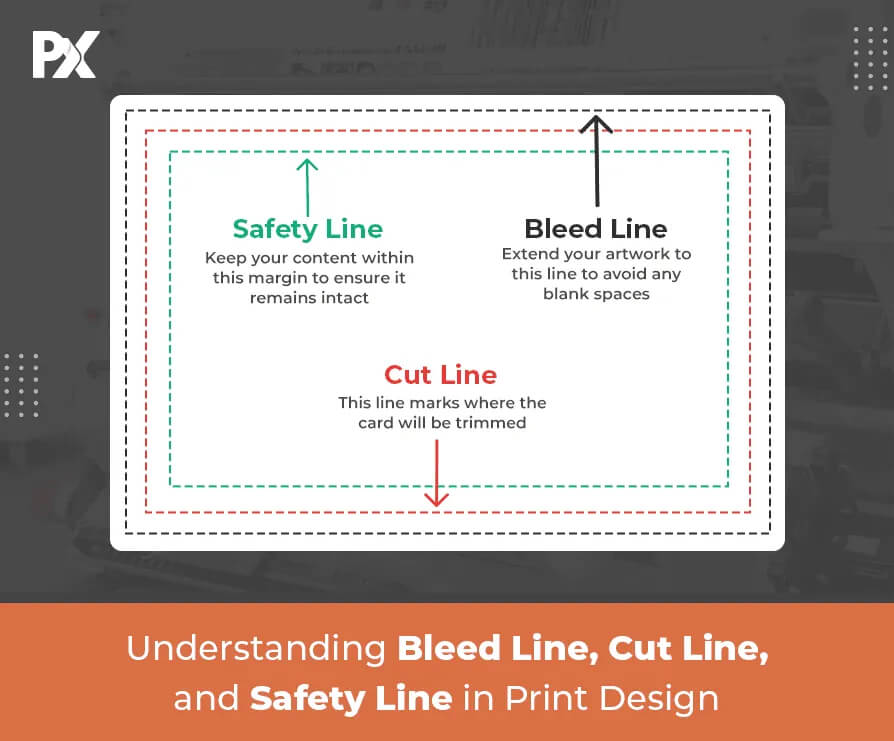
1. Bleed Line:
In the context of a web-to-print designer tool, business card bleed refers to the additional space added to a design that extends beyond the final trim size.
This extra bleed area for business cards ensures that when the design is printed and trimmed, there are no unwanted white borders or gaps along the edges.
This business card bleed area ensures that when the design is printed and trimmed, there are no unwanted white borders or gaps along the edges. The standard business card size with bleed is typically 3.75 x 2.25 inches (9.53 x 5.72 cm).
Why is this important for businesses?
Well, imagine a customer creating a business card design with a background color or image that they want to extend to the very edge of the card.
Without the business card bleed, there is a risk of the design being cut off or having unsightly white borders due to slight misalignment during printing and trimming.
By including a bleed area for business card, the design extends beyond the trim size, ensuring a seamless and professional-looking result.
2. Cut Line:
The cut line represents the final trim size of the printed piece.
It serves as a visual reference for the printer or cutting machine to know where to precisely trim the product after printing.
For businesses, providing customers with a clear-cut line within the designer tool ensures that their designs will be accurately trimmed to the desired size and shape.
This eliminates any guesswork or uncertainty about how the final product will look.
3. Safety Line:
The safety line, also known as the margin or safety margin, is an area within the cut line where important elements like text, logos, or critical design elements should be placed.
It acts as a buffer zone, ensuring that these elements remain well within the printable area and are not at risk of being accidentally trimmed or cut off during production.
Let’s consider a scenario where a customer designs a business card with essential contact information or a logo.
Placing these elements within the safety line ensures that even if there are slight shifts during printing or trimming, they will remain intact in the final product.
How Does Business Card Bleed, Cut and Safety Lines Work?
Step 1: Configuration Settings
First, you need to access the configuration settings in the web-to-print designer tool’s store module.
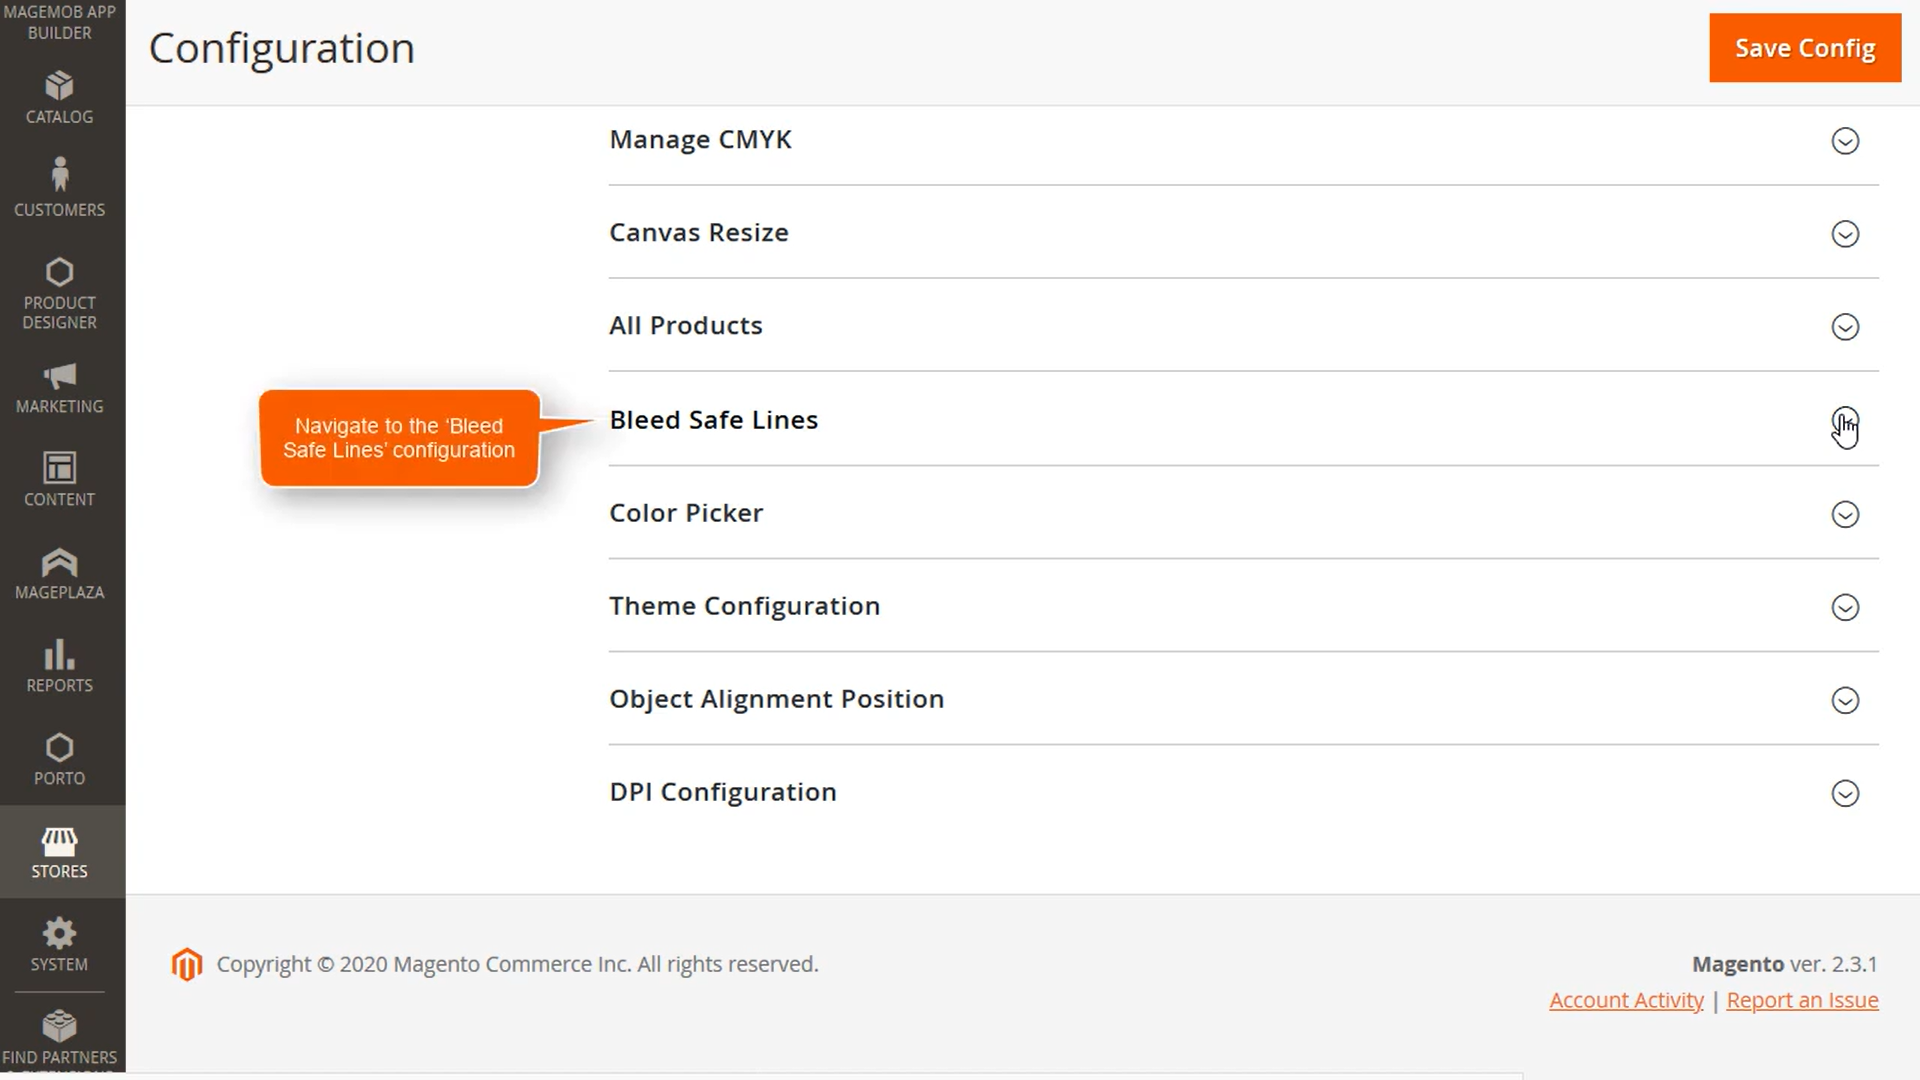
This is where you can set up and manage various features, including the bleed area for business card.
Step 2: Enabling the Feature
Within the configuration settings, you can locate the business card bleed Safe Line module and enable the bleed, cut and safety lines feature. By toggling the corresponding option, you can activate a bleed area for business card.
Step 3: Customizing Line Colors
To make the feature visually appealing and aligned with their brand, you have the option to customize the colors of the business card bleed, cut, and safe lines.
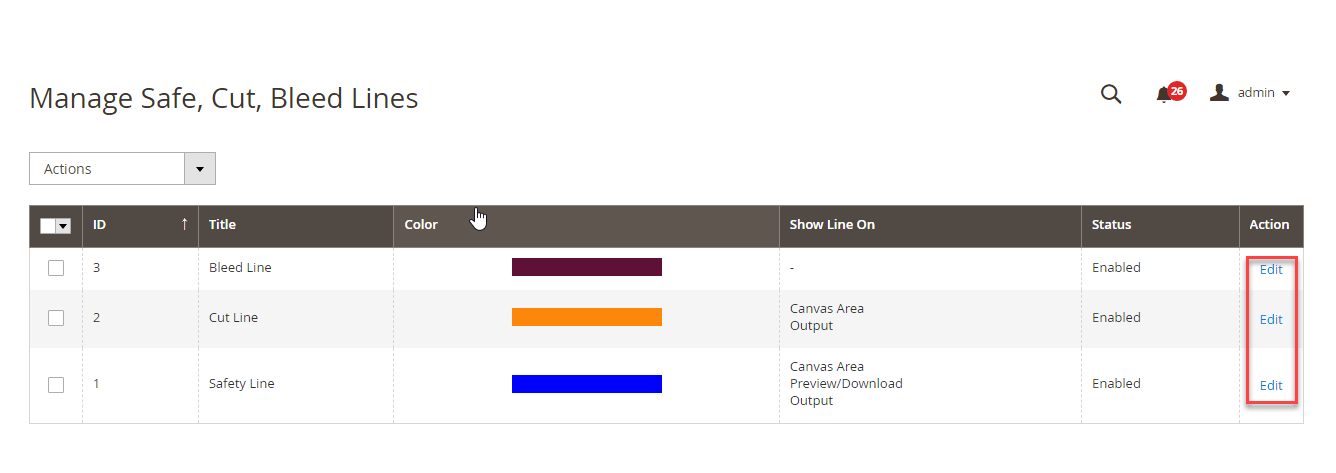
You can choose the desired colors using CMYK values, ensuring consistency with their brand identity.
Step 4: Saving the Configurations
After setting up the feature and customizing the line colors, you can save the configurations. This applies the changes and prepares the web-to-print designer tool to implement the bleed area for business card.
Step 5: Setting Default Unit
To ensure consistency in measurements, you can set the default unit for the product.
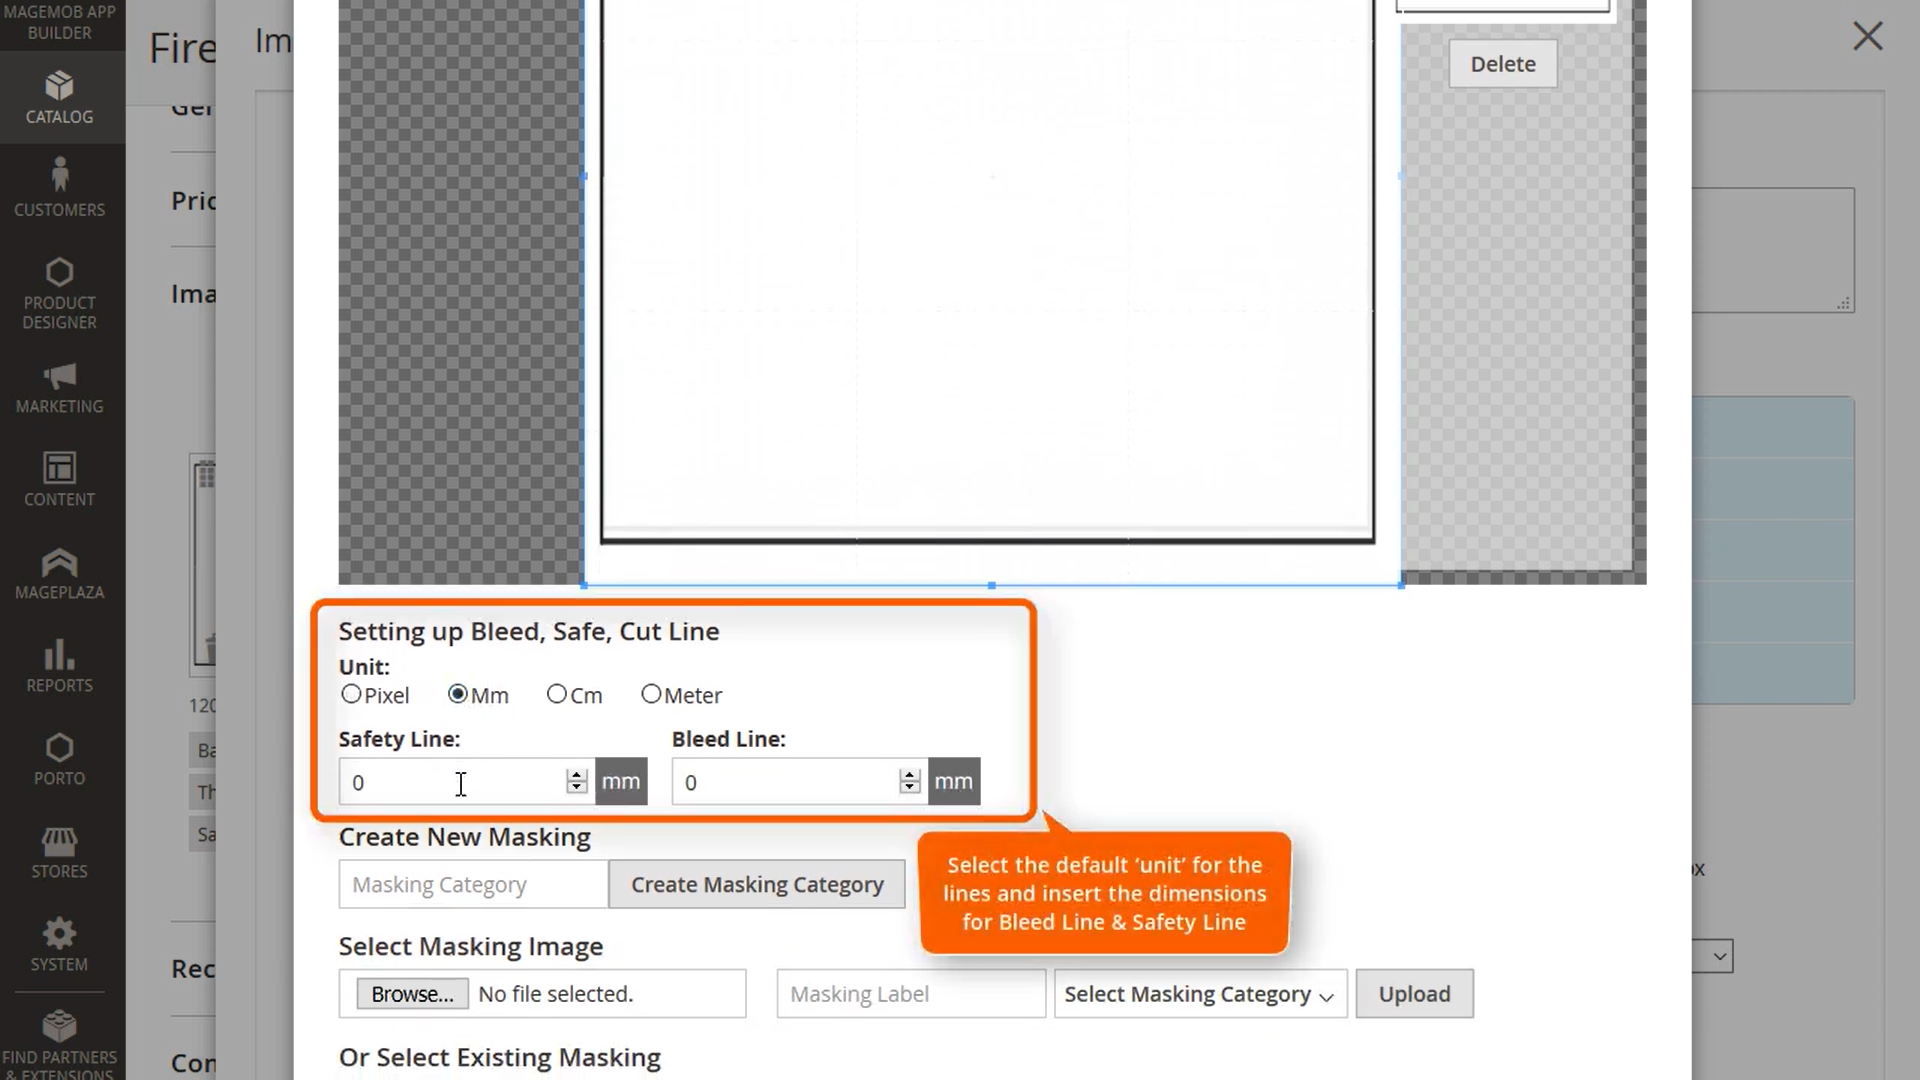
This means choosing whether to work with millimeters, inches, or any other unit for bleed area for business card that best suits your customers’ preferences.
Step 6: Enabling the Feature for the Product
On the product addition page within the designer tool, you can enable the bleed area for business card for the selected product.
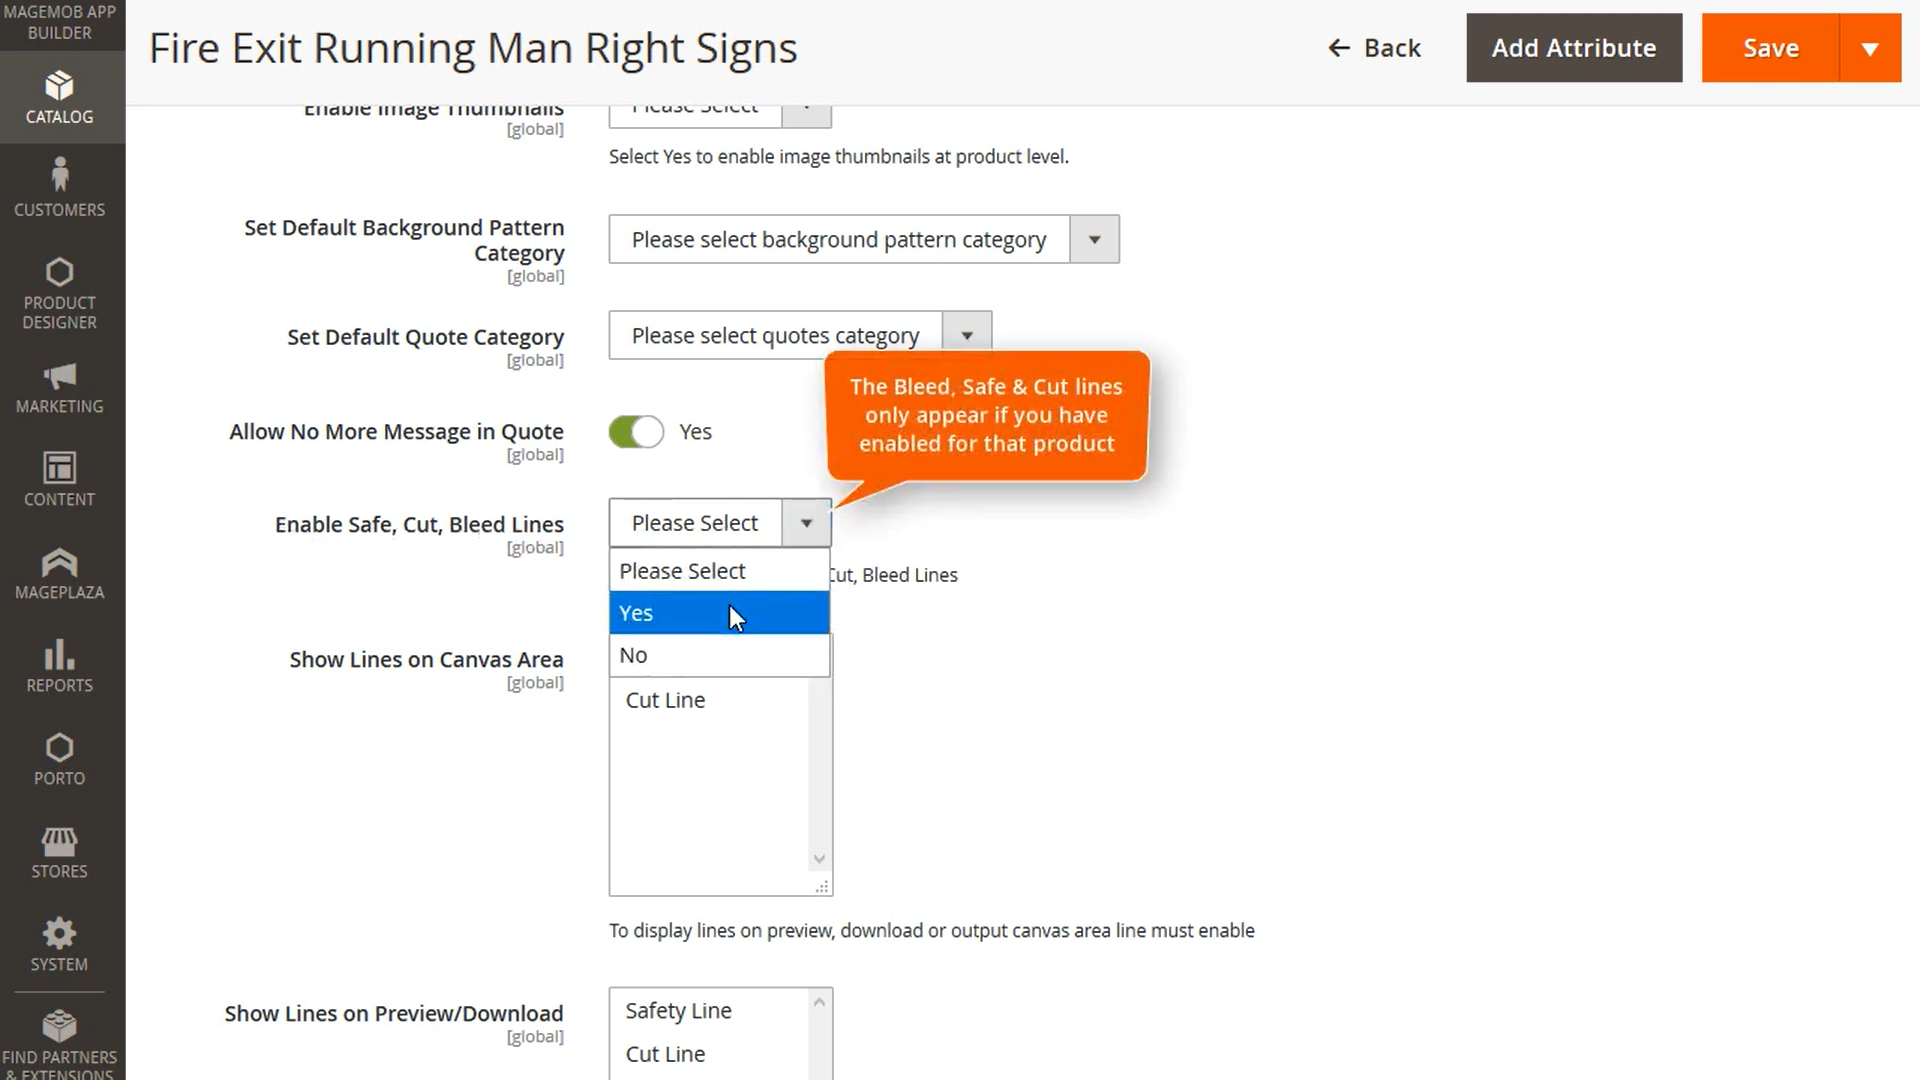
This ensures that customers will have access to these guidelines when customizing their designs.
Step 7: Real-Time Feedback for Customers
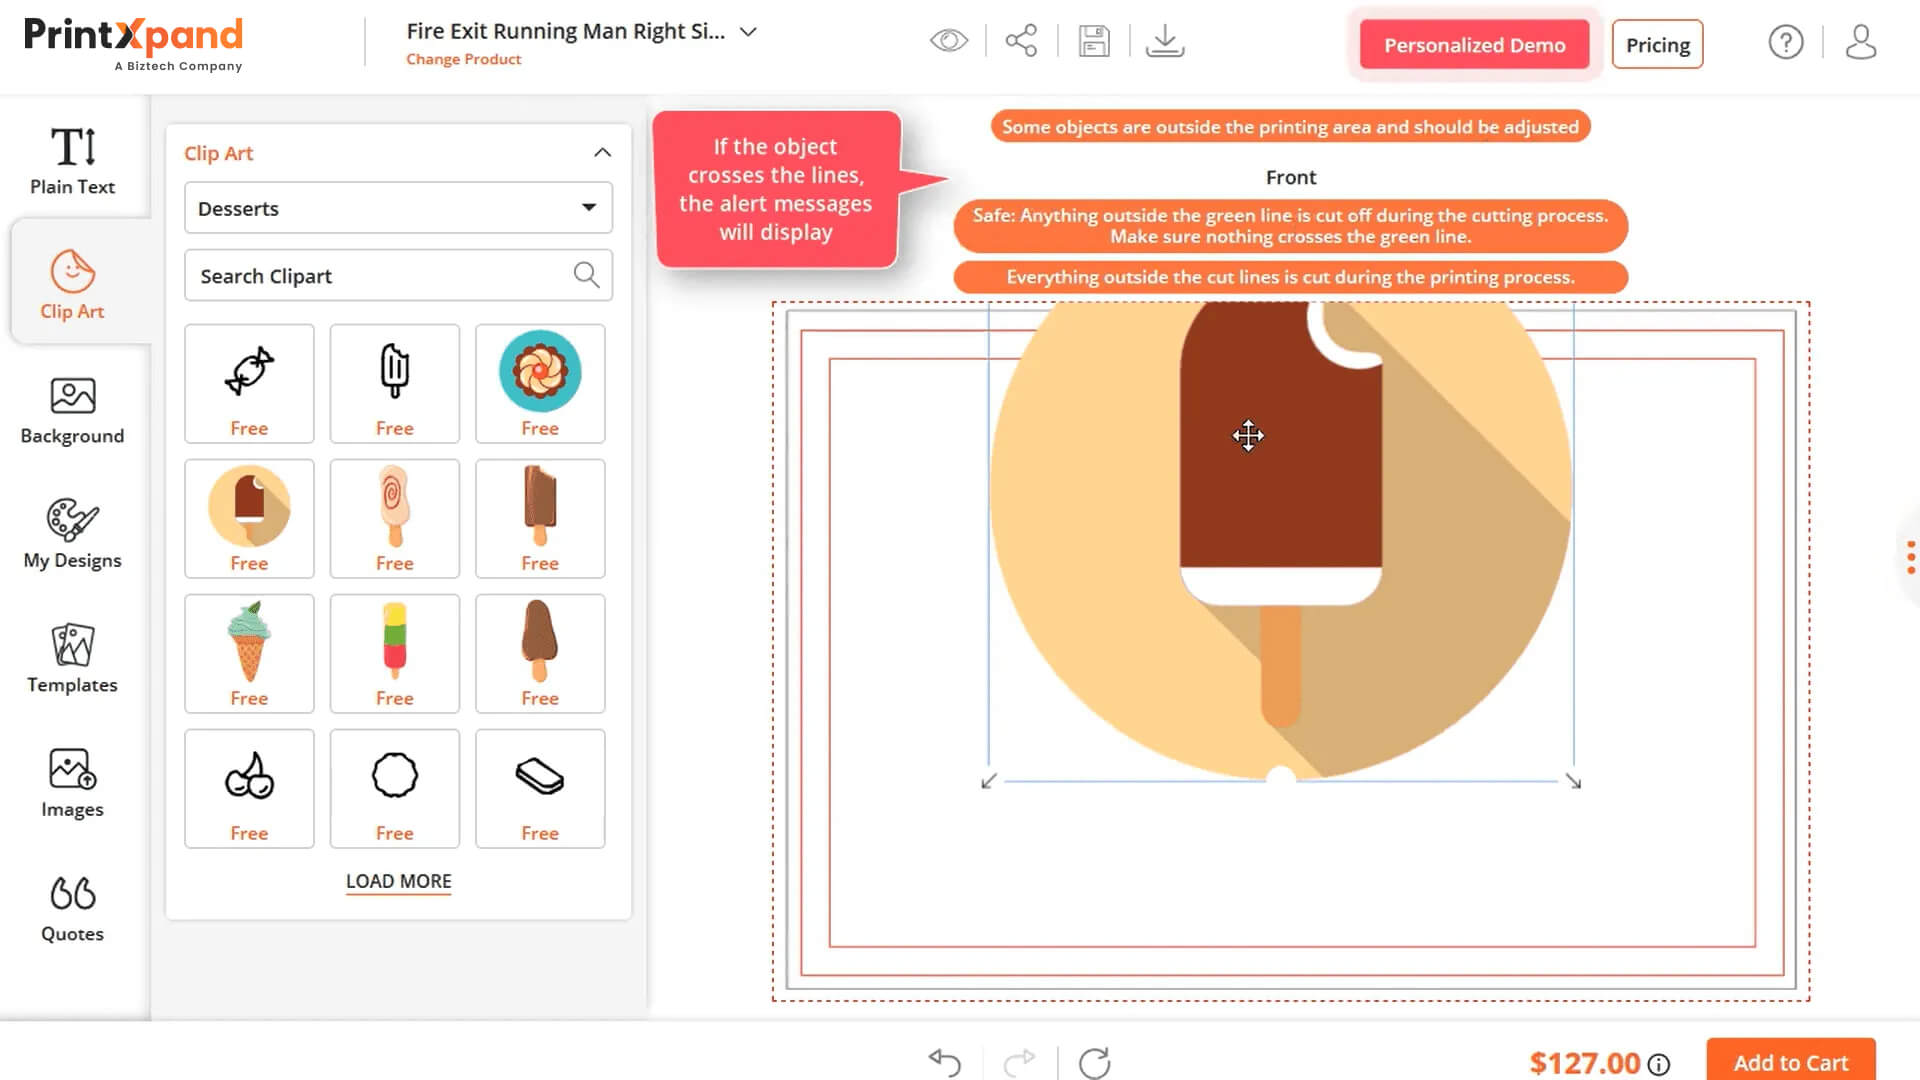
When customers use the web-to-print designer tool on the front end of the website, they will see the business card bleed, cut, and safe lines displayed on the design canvas.
As they create their designs, they receive real-time warnings if any elements exceed the specified lines. You also have the option to edit this message to suit your preferences or provide specific instructions to customers.
This immediate feedback helps customers make necessary adjustments and keep their designs within the printable area.
The Significance of Business Card Bleed and Safe Zone in Print Designs
Let’s explore why these elements are important and the benefits they provide.
Importance of the Bleed Feature in Designing:
- Prevents White Borders: Bleed area for business card ensures that the design extends all the way to the edge of the printed piece, eliminating any unwanted white borders or gaps. This creates a seamless and visually appealing finished product.
- Accommodates Printing Inconsistencies: During the printing process, slight shifts or variations may occur. By incorporating a bleed area for business card, you provide a buffer zone, ensuring that even if there are minor misalignments, the design elements will still be fully visible and intact.
Importance of the Safety Margins in Designing:
- Ensures Critical Elements Are Not Trimmed: By placing important design elements within the safe zones, you ensure that they remain well within the printable area and are not at risk of being accidentally trimmed or cut off during production. This ensures that all essential information is clearly visible in the final printed product.
- Guarantees Design Integrity: Safe zones provide a safeguard against any shifts or inconsistencies during printing or trimming. By keeping critical elements within the designated area, you maintain the integrity and readability of the design, even if there are slight variations in the final output.
Importance of Cut Lines in Designing:
- Defines the Final Trim Size: Cut lines act as a visual guide to indicate the exact dimensions of the final printed product. They help the printer or cutting machine know where to precisely trim the design, ensuring that it matches the desired size and shape.
- Provides Clarity and Accuracy: By clearly defining the cut line, you eliminate any ambiguity or guesswork regarding the final appearance of the printed product. It gives both the designer and the printer a clear reference point for achieving accurate and consistent results.
Cut Waste and Say Hi to Safe Designs With Bleed Cut Safe Feature
Bleed, cut and safe lines may seem small, but they can make a big difference in your turnaround time and customer satisfaction.
Fortunately, you don’t have to make the same mistake my friend did.
The web-to-print designer tool by PrintXpand provides all the necessary functionality, including business card bleed cut safe lines, to ensure a smooth customization process and seamless product delivery.
By enabling this feature, you empower your customers to create print-ready designs that meet professional standards.
Remember, it’s the little things that make a big impact in the world of print design.
Take the first step today and request a free, personalized demo to experience the difference.
All product and company names are trademarks™, registered® or copyright© trademarks of their respective holders. Use of them does not imply any affiliation with or endorsement by them.
FAQs
Why are bleed, cut and safe lines important?
Bleed, cut and safety lines ensure that your designs look polished and professional by preventing any unwanted white borders or cut-off elements.
In other words, they keep your prints from looking like a bad haircut.
What is the standard safety line margin?
The standard safety line margin can vary depending on the printing specifications and requirements. However, a common practice is to set the safety margin at least 0.125 inches.
Should I add bleed to print and cut?
Yes, it is highly recommended to add bleed to print and cut designs. Adding bleed allows for any inconsistencies or shifts during the printing and trimming process. It ensures that the design elements extend beyond the trim size, eliminating the risk of having white borders or cutoff content.
What are the business card dimensions with bleed?
When it comes to the standard bleed for business cards, a common standard business card bleed size is approximately 0.125 inches on each side of the design.
What is the difference between a cut line and a bleed line?
The cut line represents the final trim size of the printed product. It indicates where the design will be precisely trimmed after printing. On the other hand, the bleed line refers to the extended area beyond the cut line. It ensures that the design elements reach the edge of the printed piece, allowing for any shifts or inconsistencies during the printing and trimming process.
